The Content Studio migration tool will assist and do most of the job when migrating from version 4 (ASP and VB-script) to version 5 (ASP.NET and VB.NET).
More details on migration are found in the article Migrating to Content Studio 5.
Using the Migration tool
The Content Studio Migration tool is available for all customers and can be downloaded
at Content Studio web page.
This tool can assist you with the following:
- Analyze the database to find
- incompatible components
- server side code
- custom components
- components that can contain incompatible code
- your own defined content (configurable)
- Replace incompatible content
- ".asp" with ".aspx"
- your own replacements (configurable)
- Upgrade the database to Content Studio version 5
- Provide you with a detailed report containing found issues
Installing the tool
The migration tool can be run on any computer running Windows XP, Windows Server 2003 or later. For Windows XP and Windows Server 2003 you must have the .NET Framework 2.0 installed and it is recommended that the framework is updated to the latest version.
Copy the downloaded content, including the Data sub directory, to a directory of your choise on your computer.
In order to run the program you must be have db owner permission on the site
database to analyze or migrate.
On Windows Vista where user account control is active (default) and your Sql Server
is located on the local computer, you might need to check that your windows account
have the necessary permissions in SQL server even though that you are logged in
as a account with adminstrative privileges. Since a process that you start by default
does not run with elevated privileges you cannot rely on your membership in the
local administrator group since these rights are stripped off from your login token.
Instead you might be able to run the Migration tool with administrative privileges
or explicitly add your login to Sql Server and set it as db owner of the site database.
Running the migration tool
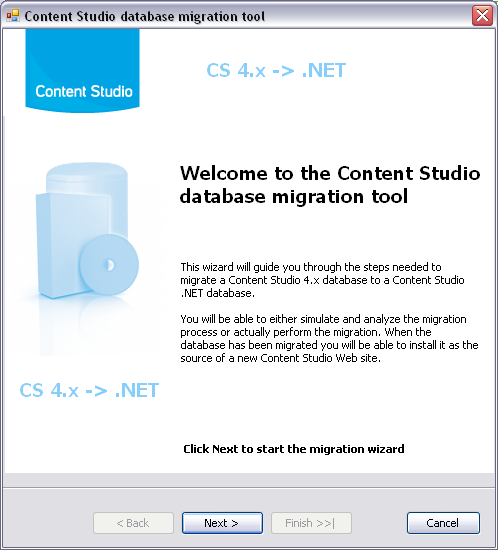
Start the migration tool by double clicking on the CSMigrationTool.exe file.
Now you will see the following welcome screen.
In the next step you need to select the database to analyze or migrate. Only Content Studio 4.x.x database can be used.
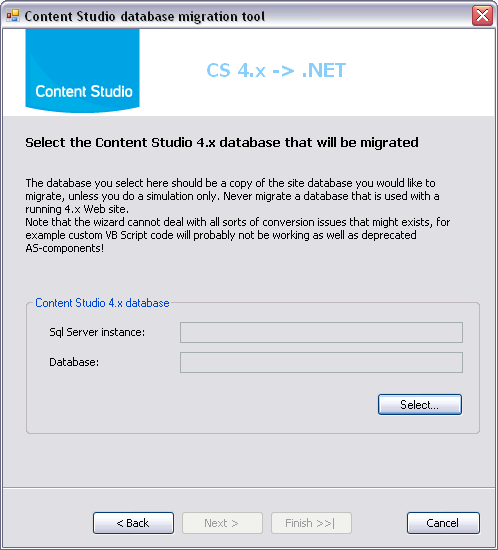
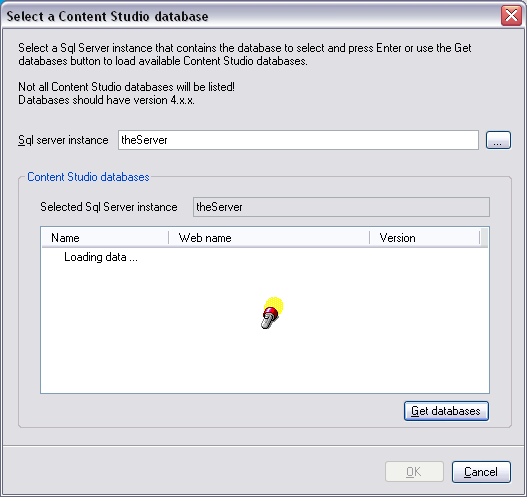
By pressing the Select button the select database dialog appears and assists you when you select the database to migrate or analyze.
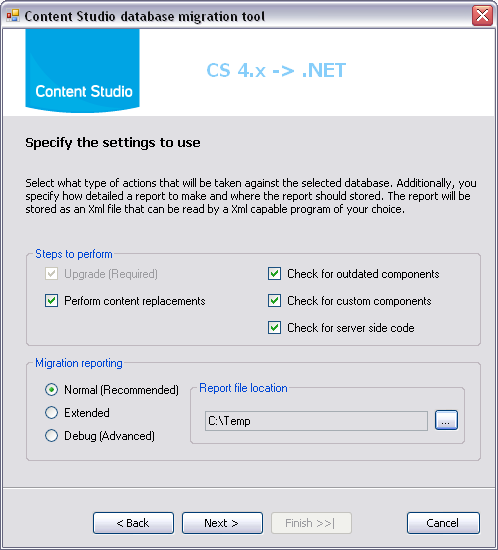
The third step asks you to specify some options to use during the process
Steps to perform
- Upgrade
- The upgrade is required, but will only be performed when the real migration is performed
- Perform content replacements
-
Perform all the configured content replacements.
This is performed only when the real migration is made - Check for outdated components
-
Checks for all occurences of outdated AS components.
All occurences found will be logged, but no data will be changed. - Check for custom components
-
Checks for all occurences of custom AS components.
All occurences found will be logged, but no data will be changed. - Check for server side code
-
- Inline server side code.
- This is code that exists between <% %> script tags
- Script block server side code.
-
This is code that exists between
<script runat="server">
</script>
elements
Migration reporting
- Normal
-
Only general information scan results and summary is written to the report file
This is the recommended level that will server most users. - Extended
-
The same info as the Normal level together with more detailed information is written
to the report file
This setting is inteded for users that would like to have information about most details. The reporting file generated is often serveral times bigger than the file generated by Normal level. - Debug
-
The same info as the Extended level is written to the report file but on an extremly
detailed level.
This setting is inteded when there is a need to detect problems with the program. The reporting file generated can be very large and difficult to read for normal programs. - Reporting file location
-
This alternative allows you to select the directory where the reporting file should
be stored.
Before you can continue you must choose a reporting location.
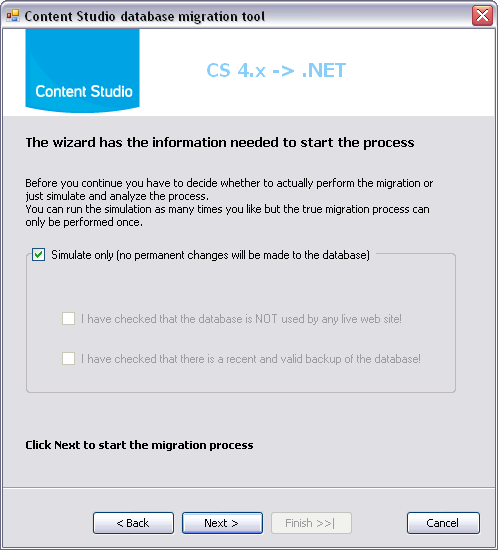
Before starting the actual process you can select whether to migrate or just simulate and analyze the migration process.
By default the tool is set to just analyze the database and simulate the migration process rather than actually perform it. This makes it possibly to test the process and get the report before any migration is done something that radically facilitates the often difficult task of estimate the work and time needed for a CS 4 to CS 5 migration.
If you uncheck the Simulate only checkbox you will start a true migration process in the next step. Before the tool allows you to start you will need to verify that you have a valid backup and that the database is not in use by a running website.
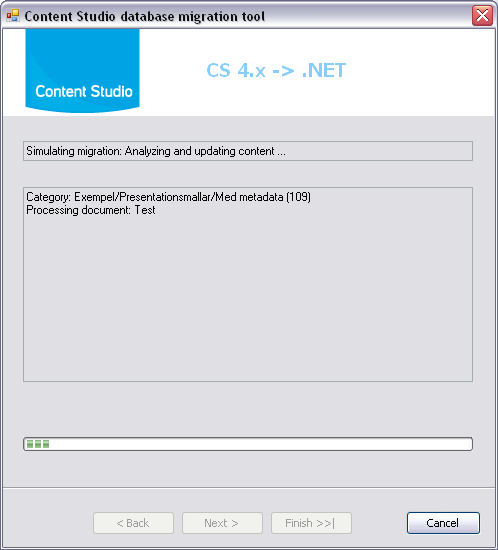
During the actual migration process you can follow what is going on in the status window. Detailed messages are not shown here but logged to the report file so you can see them afterwards.
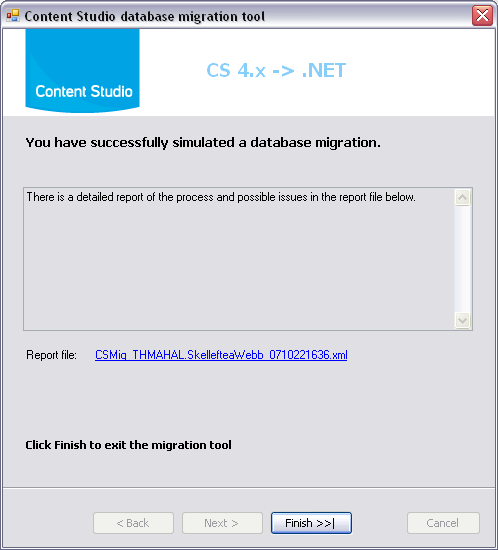
The last step shows a summary of the analyze or migration that has been done and alsow allows you to directly open the generated xml report file by clicking the link.
The report file has a consistent schema that makes it possible to open with for example Microsoft Excel and filter the data as you like. The sample below shows that the xml report file is made up of a series of report items that either display some sort of information, a compatibility warning or a breaking error. The idea is to separate the entries in groups that probably will have the following impact on your web site.
- Information
- Impact: none.
- Warning
- Impact: Will probably not work but a workaround exists.
- Breaking (Error)
- Impact: Will not work and the page or component must be rewritten, or, the functionality is no longer supported.
<?xml version="1.0" encoding="utf-8"?>
<Report>
<Item>
<Number>1</Number>
<Created>2007-11-29T15:21:42</Created>
<EventID>1</EventID>
<Event>Information</Event>
<Item />
<Description>CS Database migration report for Sql Server instance:
THMAHAL; Database: SkellefteaWebb
</Description>
<Data />
</Item>
<Item>
<Number>2</Number>
<Created>2007-11-29T15:21:42</Created>
<EventID>1</EventID>
<Event>Information</Event>
<Item />
<Description>Starting a simulation of the migrating process</Description>
<Data />
</Item>
<Item>
<Number>33</Number>
<Created>2007-11-29T15:22:01</Created>
<EventID>4</EventID>
<Event>Warning</Event>
<Item>Admin/HTML-sidor/A till Ö (1605)</Item>
<Description>The document contains the "Web map A-Z" AS-component
which is outdated. Replacement: "Web map A-Z 2.0".:
Occurences: at least one.
</Description>
<Data />
</Item>
<!-- more Item elements-->
<Item>
<Number>34</Number>
<Created>2007-11-29T15:22:01</Created>
<EventID>4</EventID>
<Event>Warning</Event>
<Item>Admin/HTML-sidor/Kalendarium (1822)</Item>
<Description>The document contains the "Insert script" AS-component
which might contain incompatible code.: Occurences: 3
</Description>
<Data>
************ Content of matching scan item no. 1 **************
<% DrawCalendar("") %>
************ End content *********
************ Content of matching scan item no. 2 **************
<%
if(Request.QueryString("date") <> "") then
dDate = cDate(Request.QueryString("date"))
else
dDate = cDate(Date)
end if
iWeek = Request.QueryString("week")
if(iWeek = "") then iWeek = 0
WeekStart = DateAdd("d", (Weekday(dDate) - 2)*-1, dDate)
if(DateDiff("d", WeekStart, dDate) = -1) then WeekStart = DateAdd("d", -7, WeekStart)
for i = 0 to 4
%>
************ End content *********
************ Content of matching scan item no. 3 **************
<%
next
%>
************ End content *********
</Data>
</Item>
<!-- more Item elements-->
<Item>
<Number>110</Number>
<Created>2007-11-29T15:22:03</Created>
<EventID>1</EventID>
<Event>Information</Event>
<Item />
<Description>******* Start summary *******</Description>
<Data />
</Item>
<!-- more Item elements-->
<Item>
<Number>125</Number>
<Created>2007-11-29T15:22:03</Created>
<EventID>1</EventID>
<Event>Information</Event>
<Item>AS component: "Preview draft button"</Item>
<Description>Occurences found in 1 document(s).</Description>
<Data />
</Item>
<Item>
<Number>126</Number>
<Created>2007-11-29T15:22:03</Created>
<EventID>1</EventID>
<Event>Information</Event>
<Item />
<Description>****** End summary ******</Description>
<Data />
</Item>
</Report>
The generated report together with a manual analyze of the site structure and the content in general can be used when you estimate the amount of work that needs to be done to get the web site working in the new environment.
Customizing the migration tool
During the migration process the tool performs both content replacement and content
scanning operations. Event though these actions covers the most common tasks there
might be cases where a developer needs to do provide their own replacements or scans.
The instructions used is all stored in the file config.xml that must be located
in the same directory as the executable file CSMigrationTool.exe
This file is in the Xml format and is divided into two main sections:
- configuration/replacements
- This section stores all the replacement instructions
- configuration/scans
- defines a list of scanning instructions to be made
<?xml encoding="utf-8" version="1.0" ?>
<configuration>
<!-- This section searches the content for an expression and replaces it with another-->
<replacements>
<!-- A list of replacement to be performed
mandatory: true if the scan is mandatory, for future use only.
case-sensitive: true if the searchcondition is case sensitive, false otherwise.
description: A description of the scan to be performed. searchcondition:
searchcondition: A regular expression to be used to find matches that should be replaced
replacements: The replacement string that will replace the text find by searchcondition.
If the replacement contains a $ (dollar) character this must be replaced with $$.-->
<replace case-sensitive="false"
description="Replacing .ASP with .aspx" mandatory="true"
replacement=".aspx"
searchcondition=".ASP(?=\W|$)" />
</replacements>
<!-- This section contains a number of scan elements that defines what to search and warn for-->
<scans>
<!-- Scans to be performed
class: can be code or component. Also one item marked as class=template can exist
level: can be 0=Information, 1=Warning or 2=Breaking.
case-sensitive: true if the searchcondition is case sensitive, false otherwise.
description: A description of the scan to be performed, for debug logging mainly.
searchcondition: A regular expression to be used to find matches.
message: A message to be written along with the document id and name if any match was found.
findAll: (true, or false) optional, searches for all occurences that matches the searchcondition.
The default value is false.
displayContent: (true or false) optional, writes the content of the matches to the reports data field.
The default value is false.
xPathToSource: Optional, only used with class="component". When displayContent="true" this is an
Xpath expression that can be used to extract parts of the content of the Xml definition
of the sought after component.
The XPath-expression may return more than one node, in that case the different nodes will be
grouped with a delimiter between them where the node name is indicated.
-->
<scan class="code"
level="1"
case-sensitive="true"
description="Inline script blocks"
searchcondition="\<\%[\s\S]*?\%\>"
findAll="true"
displayContent="true"
message="Inline ASP script code found!" />
<!-- AS components that can contain incompatible code-->
<scan class="component"
level="1"
case-sensitive="true"
description="AS component: "Insert script""
message="The document contains the "Insert script" AS-component which might contain incompatible code."
findAll="true"
displayContent="true"
searchcondition="<CSROOT[^>]+>[\s]*?<CSSCRIPT[^\>]*?\sname\=['"]Insert\sscript['"][\s\S]*?</CSROOT>"
xPathToSource="CSROOT/CSSCRIPT/PARAMETERS/PARAMETER[@name='Script']/@value" />
</scans>
</configuration>
As you can see in the excerpt from the config.xml file, you can provide your
own replacement and scan operations that should be executed during migration. Before
you run the program you must be sure that your regular expressions work exactly
as expected and that there in not syntax error in the file. As always it is a good
idea to always have a working copy of the config.xml file that you can use
in case something goes wrong. Please examine the file to see how we have done it
and what actually is going on under the hood.
The example above shows the configuration for a replacement operation and a code
scanning operation where all the occurences of inline code blocks are found and
the content of these script blocks are written in the report. The third example
searches for all occurences of the Insert Script component and uses an XPath query
to retrieve the code content of the Script parameter in AS component Xml source.